VRChat Safety and Trust System

The VRChat Trust and Safety system is a extension of the previously implemented VRChat Trust system. It is designed to keep users safe from nuisance users using things like screen-space shaders, loud sounds or microphones, visually noisy or malicious particle effects, and other methods that someone may use to detract from your experience in VRChat.
This system is designed to give control back to the user, allowing users to determine where, when, and how they see various avatar features that may be distracting or malicious if used improperly.

The Trust and Safety system is designed so that, even when left on default settings, the system will ensure that someone can’t attack you with malicious avatar features. Malicious users won’t have these features shown, so you can have a good experience in VRChat
There are two vital components of this system, the Trust system, and the Safety system. Let’s go over them in a bit more detail.
The Trust System
The Trust system is actually already implemented in VRChat! It is what determines when a user is permitted to upload content — you may have heard us calling it “Content Gating” previously. However, the system is far more than just determining if you can upload content — it looks at user behaviour to determine “Trust”, which is an aggregate of many variables. We can easily adjust the way we calculate this value, so we can tweak it as time goes on.
Trust Rank
A user’s Trust feeds into something we’ve called a “Trust Rank”, which is an indicator of how much time a user has spent in VRChat, how much content they’ve contributed, the friends they’ve made, and many other factors. These ranks are as follows:

You gain these ranks simply by playing VRChat — as you explore worlds, make friends, and create content, you will gain more Trust, which determines your Trust Rank.
The ranks are displayed on nameplates when you open your Quick Menu. Otherwise, they get out of the way and are not visible during normal play.
Friends are a special Trust Rank. Users that you have Friended have all of their avatar features shown in the Normal Shield Level, and you can customize them just like any other Trust Rank.
The transition between “Visitor” and “New User” is a special one — when a Visitor becomes a New User, they gain the ability to upload content to VRChat as long as they’re using a VRChat account. Users receive a notification when they have passed this rank, and are directed to the VRChat documentation page to get started with creating content.
Users will receive a notification when they transition Trust Ranks.
All ranks from “Known User” and upward also have the ability to toggle off the display of their rank on their nameplate. They can choose to appear as a “User,” which will change their Trust icon and text to the User Rank, and will also change how the Safety system treats them to match the User Rank settings. This is for users who do not wish to show off their higher rank for whatever reason. You can change your rank display by clicking on your trust rank on the profile page below your status.
By default, Known and Trusted users display their rank. Using the toggle will display you as a User.

Additionally, there exists a special rank called “Nuisance”. These users have caused problems for others, and will have an indicator above their nameplate when your quick menu is open. Most of the time, these users’ avatars will be completely blocked. You probably won't see these often-- which is a good thing!
Finally, there exists a “VRChat Team” rank, which is only usable by VRChat Team members. When a VRChat Team member has their “DEV” tag on, you’ll see this rank in the quick menu when you select them. If you have doubts that a user with a “DEV” tag is actually on the VRChat Team, just open your Quick Menu, select them, and check out their Trust Rank. If it doesn’t say “VRChat Team” under the avatar thumbnail, then that user is not a member of the VRChat Team, and is likely trying to confuse users. Feel free to take a screenshot and report them to the Moderation team!
If a VRChat Team member doesn’t have their “DEV” tag on, they’ll appear as a normal user.
What does the Safety System do?
“Safety” is a menu tab that allows you to configure how users of each rank are treated in regards to how they display for you in VRChat. This affects many aspects of a user’s presence in VRChat:
- Voice — Mutes or unmutes a user’s microphone (voice chat)
- Avatar — Hides or shows a user’s avatar as well as all avatar features. When an avatar is hidden, it shows a “muted” avatar
- User Icon and Emoji — Controls user icon and custom emoji visibility for this Trust Rank. When an icon is hidden, it is "censored" with a mosaic effect and custom emoji are completely invisible.
- Audio — Enables or disables sound effects from a user’s avatar (not their microphone)
- Lights and Particles — Enables or disables particle systems on a user’s avatar, as well as any light sources. This will also block Line and Trail Renderer components.
- Shaders — When disabled, all shaders on a user’s avatar are reverted to Standard. The behavior behind the Shader blocking system is detailed on our Shader Blocking System doc page
- Custom Animations — Enables or disables custom animations on a user’s avatar
- Animated Emoji — Enables or disables custom Animated emoji. When enabled animated emoji will not be visible at all
Each rank has their own unique settings. To illustrate this, here’s a screenshot of the Safety Menu:

There are four main elements in this Menu to pay attention to.

At the top is a row of “Shield Levels”, which are preset settings for the Safety System that we’ve developed. These Levels should cover most of your needs — however, you’re free to customize them completely in the “Custom” Level, which is a special mode where you can create your own settings.

In the middle are the actual settings for the Shield Level you’ve selected. They cover each of the elements that the Safety System affects, and if you’re in Custom Mode, you can toggle them as you see fit.

At the bottom is a listing of each of the Trust Ranks. When you’ve chosen a “Safety Mode”, you can select each Rank to see how avatar features of that Rank are set.

The text inside the blue area below the Safety Modes changes as you select different Modes. The text at the bottom also changes as you explore the menu, and helps inform you about the UI element you’re pointing at.
Once you’re done setting this up, close the menu. The settings will apply, and you’ll see them take effect on the users around you.
In general, we have tuned the system such that most users can leave the system on “Normal”. Most users should not have to do anything, and the Safety system will work properly. If you wish to customize Safety to your own liking, you are free to do so via the Custom Shield Level.
Finally, you might notice that the settings for “Safe Mode” in System have disappeared. That’s because they’ve been absorbed into the Safety System. Pressing the keybind for Safe Mode (Shift+Esc on Desktop, Both Triggers + Both Menu buttons in VR) will change your Shield Level to Custom, and will turn off all settings for all ranks. We realize this behavior will wipe your custom settings, and plan on implementing a dedicated “Safe” Shield Level in a future update.
Hiding or Showing Specific Users
You might encounter a user that, despite their higher Trust Rank, is wearing an avatar you’d rather not see. You can select that user and choose “Hide Avatar” in their social panel. This will hide that user’s avatar and disable all features except for voice. You can re-enable their avatar and features by simply clicking the button again, which will be labeled “Show Avatar”.
If you’d like to return the control of showing the avatar to the Safety System, just click “Use Safety Settings”.
You can disable the entire system if you want. Selecting the “None” Shield Level will show almost all features for every rank, or create a Custom Shield Level that has all features on for all ranks. However, we don’t recommend using this setting unless you trust everyone in the room. This does not affect Nuisance users — they will always have everything hidden unless you explicitly unhide them.
You can override these settings on a per-user basis in two ways. The first way is to select a user that has their avatar or features hidden by the current Safety settings, find “Show Avatar”, and click it. This will display the avatar and all avatar features, no matter what Safety mode you have currently active. “Hide Avatar” does the opposite — no matter what Safety Mode you’re on, that user’s avatar will be hidden. You select “Use Safety Settings” to let the Safety Mode that you’re using manage that user’s avatar visibility.
The second way is to make friends! Friends have no features hidden in Normal Shield Level. If you have someone as a Friend, we assume that you implicitly trust them. As such, their avatar features will be completely on in Normal Shield Level. If, for some reason, you want to hide your friend’s avatar, you can still do that with the “Hide Avatar” button.
Safe Mode
Depending on the controls you are using, there is a shortcut to immediately disable all features on all users around you. This is called "Safe Mode".
On VR controllers, pulling both triggers and pressing both system menu buttons will enable this mode. On Desktop, pressing Shift and Escape will enable this mode.
When enabled, the Safety System will be set to Custom mode with all features off for all users. Text will appear in the middle of the screen explaining what just happened. This will override your Custom settings, if you were using them previously. All avatars for all users will be hidden and all voice will be disabled from other users.
To disable Safe Mode, set your Safety System back to your previous mode. If you were using Custom mode, you will need to manually reset your settings back to your previous setup.
Quick Menu “Scanning Mode”
When you open your Quick Menu, you will be able to see more information on user’s nameplates, as well as view information on users. This acts as a “scanner”, providing more information when your Quick Menu is open. If you point at a user, you’ll get basic quick info. Clicking on the user will show more details. This will show their avatar thumbnail, their name, their displayed rank, as well as other information.
Interacting with a User

If you click on a user, VRChat opens the more detailed Social Quick Menu.
.png")
This menu also allows you to do several things. For example:
- Send a friend request.
- Mute or unmute the user's voice.
- Hide, show, or use your safety setting for the user's avatar
- View their avatar details.
- Block or unblock the user.
Clicking “<” and “>” at the top right lets you scroll through all the users in the instance. This is useful just to get a picture of how you have settings set for users, who you have muted, who you have as a friend, etc.
The "Back" button takes you back to the previous menu, which is usually the Quick Menu.
Instance Moderator Actions
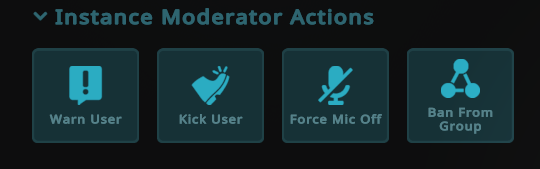
Instance Moderator Actions are available when you are the owner of an instance or the owner/moderator/admin of a group instance. They allow you to moderate your instance by
- Warn User: Send the user a message telling them they have been warned.
- Kick User: Remove the user from the instance. They will not be able to join for 1 hour.
- Force Mic Off: Mute the player's microphone. The player can unmute their microphone freely.
- Ban From Group: Bans the selected user from the group that owns the instance. The player will be unable to join group instances from that group and won't be able to join that group.
Hiding and Showing Avatars
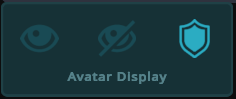
In the Social Quick Menu, clicking “Use Safety Settings” will allow the Safety Mode that you’ve chosen to determine how to display that user’s avatar. Choosing “Show Avatar” or “Hide Avatar” will override the Safety Mode you’re on, and show/hide the avatar and all features.
Clicking “Show Avatar”(the eye icon) is the easiest way to override the Shield Level for an individual user!
Nameplates
The Safety and Trust system stays out of the way the majority of the time. Namely, a user's Trust Rank is only visible when you open the Quick Menu. This can be changed in the settings under "User Interface" > "Nameplate" or in the radial menu under "Options" > "Nameplates."
The text in the top left of the nameplate indicates what Trust Rank that user has. Again, this text will only appear when you have your Quick Menu open. In the top right is the user's avatar performance rank.
How does the Trust system work?
The Trust system’s inner workings are intentionally hidden so that it is more difficult to exploit. Regardless, the best way to raise your Rank is simply to play VRChat — spending time exploring, making friends, and creating content (once you are permitted to do so) will all help you increase your Trust Rank, and will show off more of your avatar’s features.
There are a few things we want to point out that will not raise your Trust Rank:
- Standing or idling in a room (AFKing)
- Uploading a large amount of low-effort content
- Mass-friending large amounts of users
How am I protected from malicious users?
We have built this system to be durable, and it is capable of detecting and mitigating attacks against a user’s reputation. Although we can’t share exact details of how we mitigate these types of attacks, it is something that we are both prepared for, and can easily adjust to adapt to potential problems we did not foresee. We have prepared for these types of problems and have the ability to adapt to rising issues quickly.
Updated 9 months ago